|
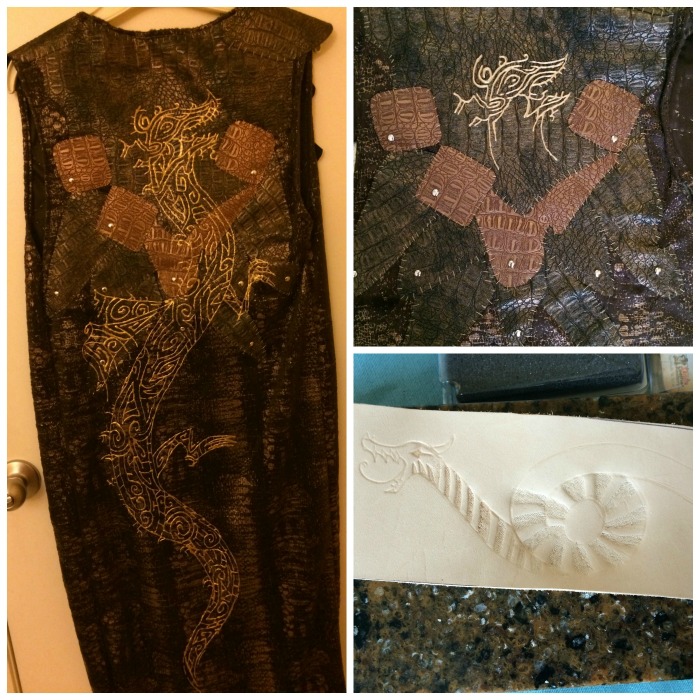
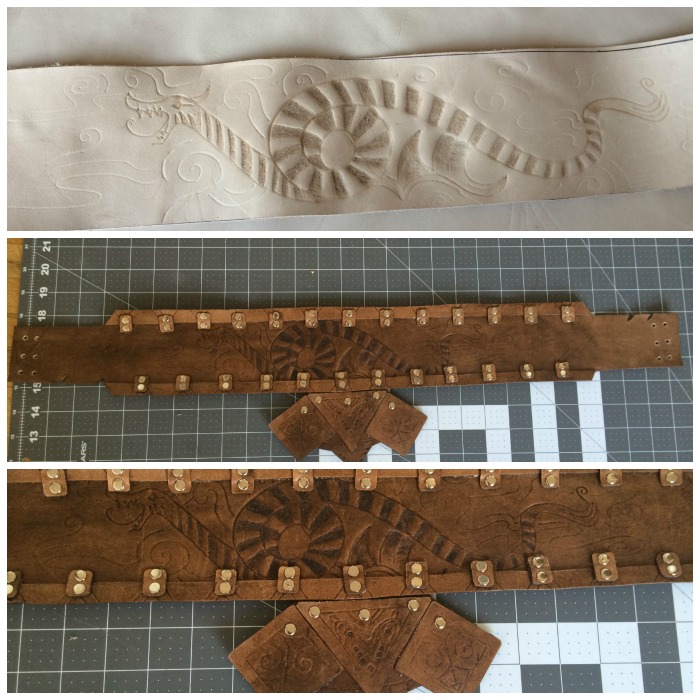
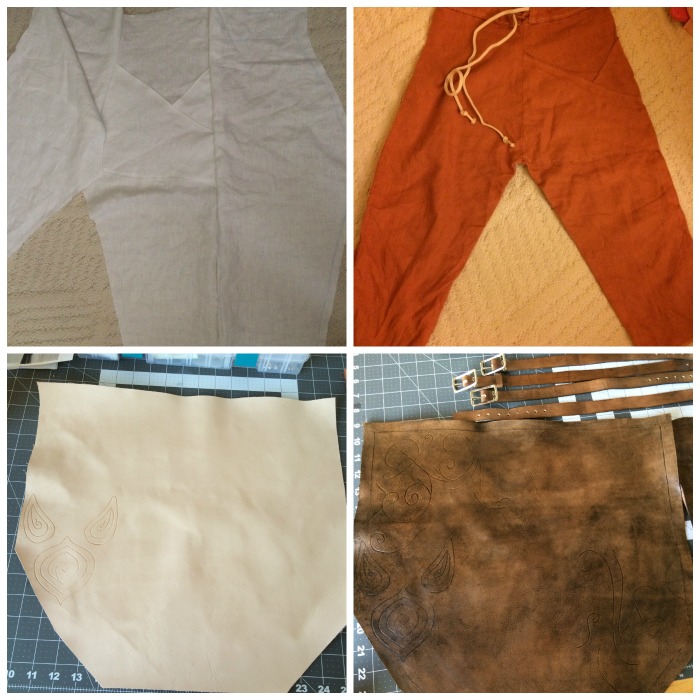
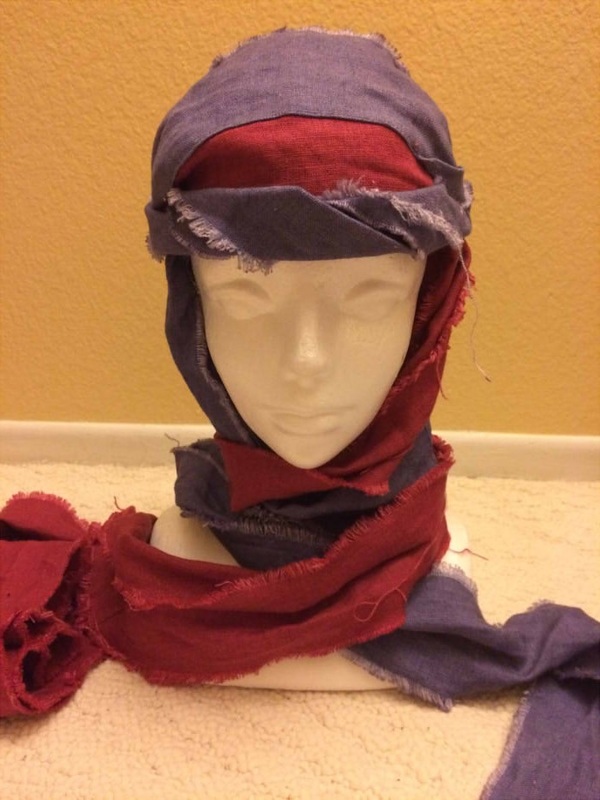
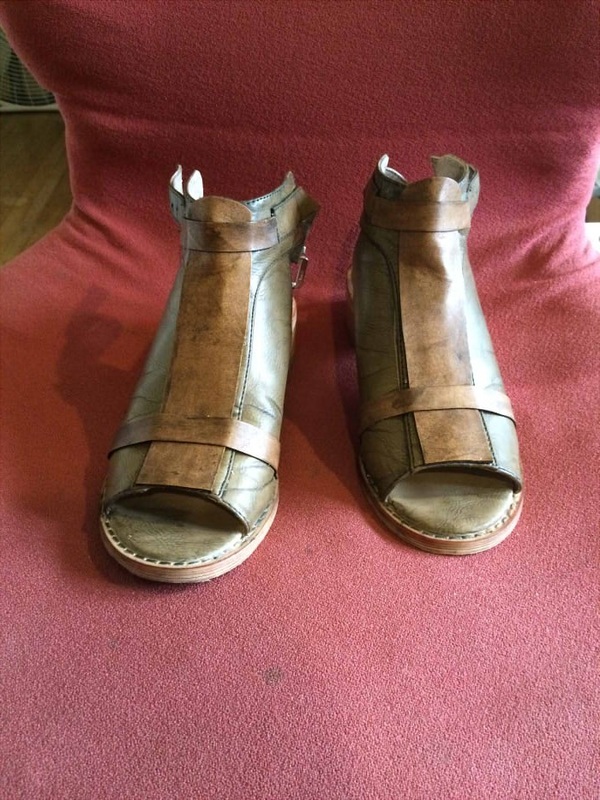
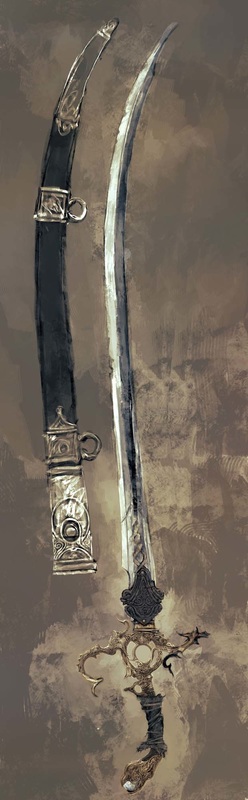
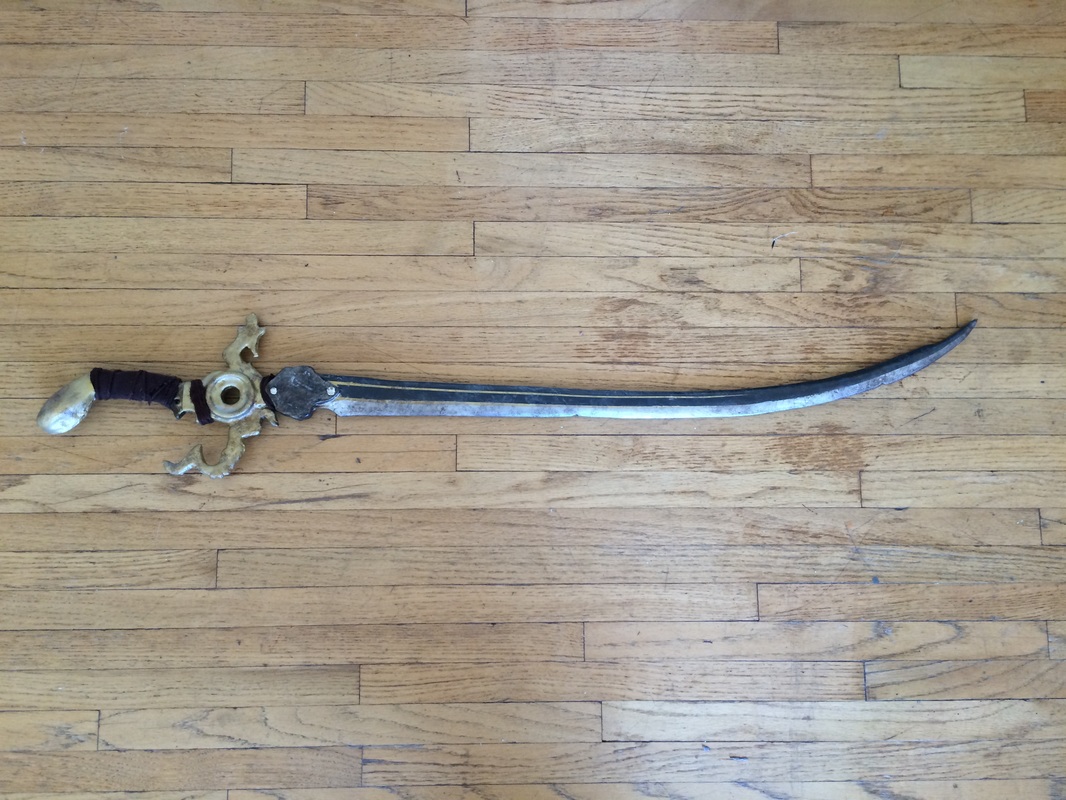
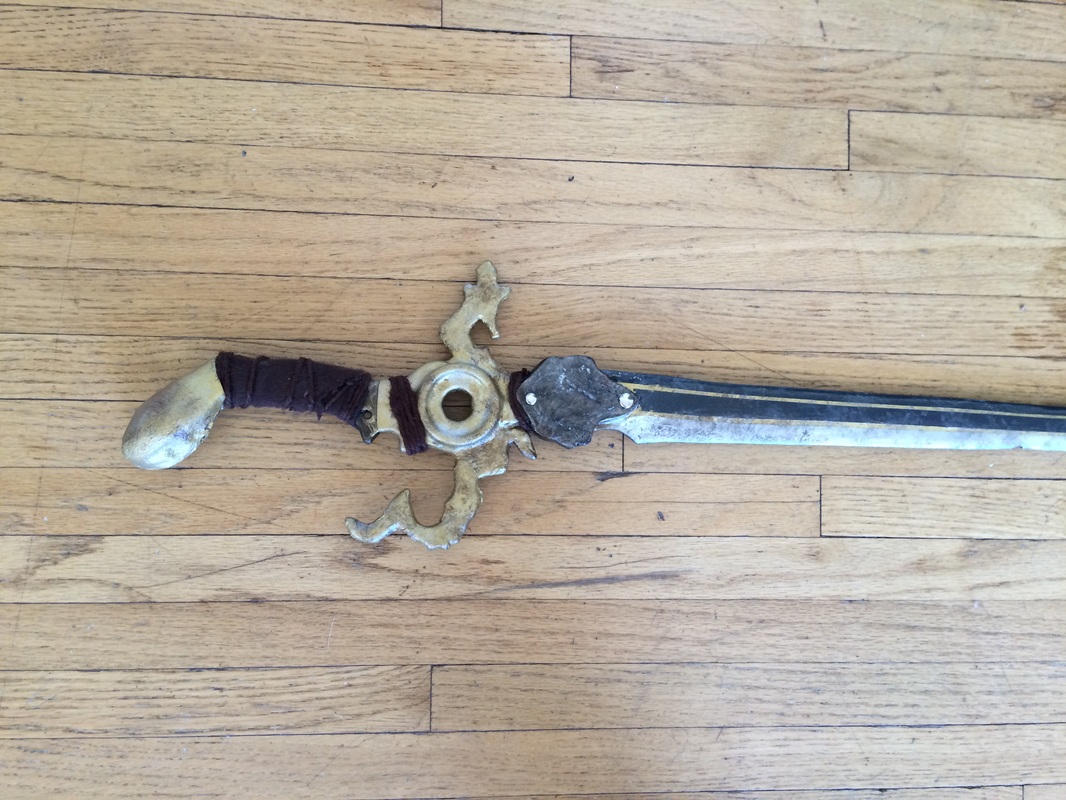
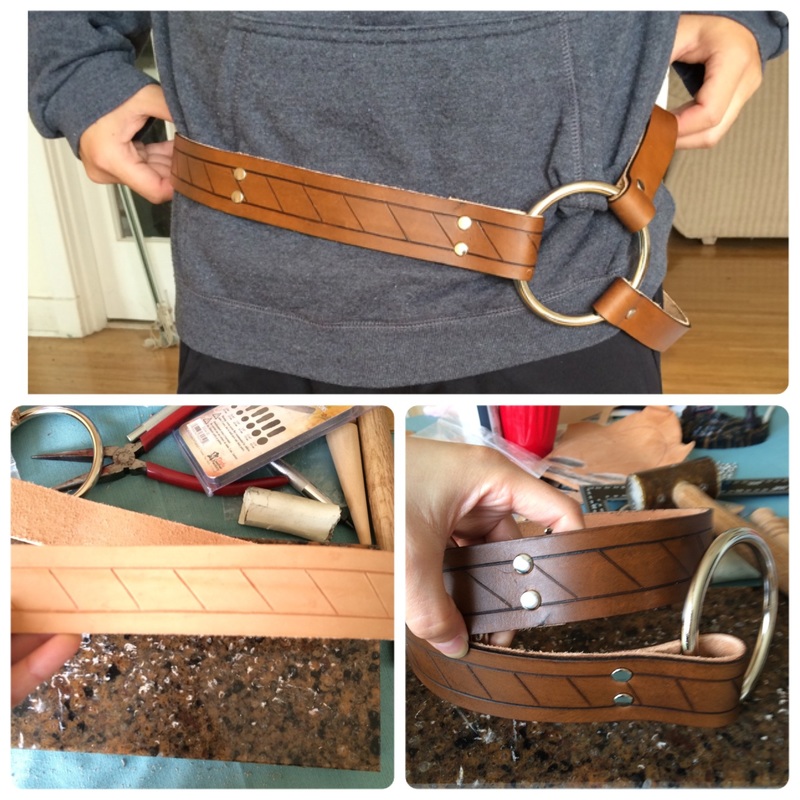
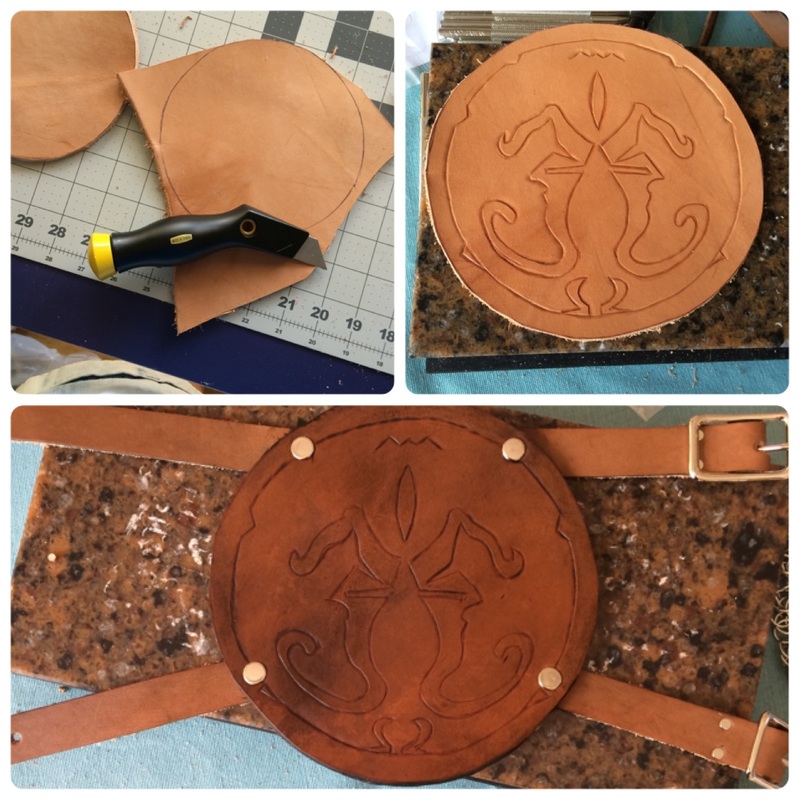
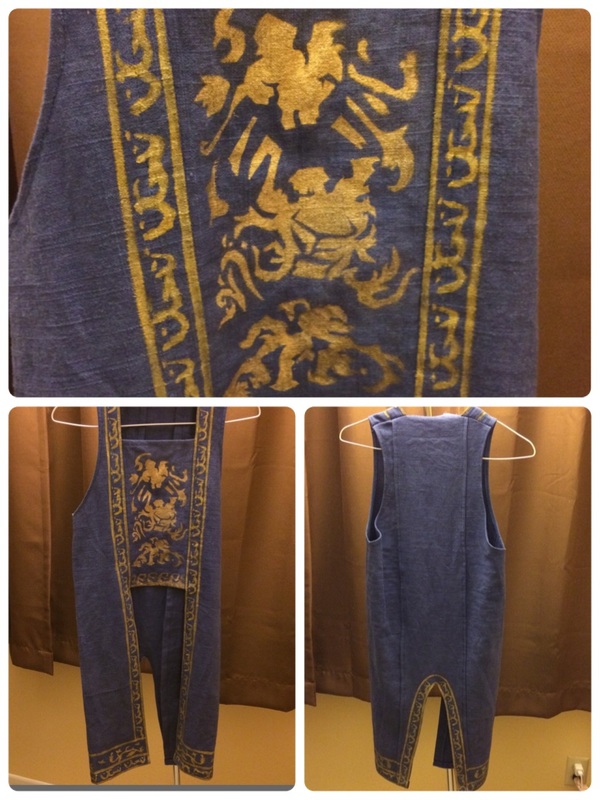
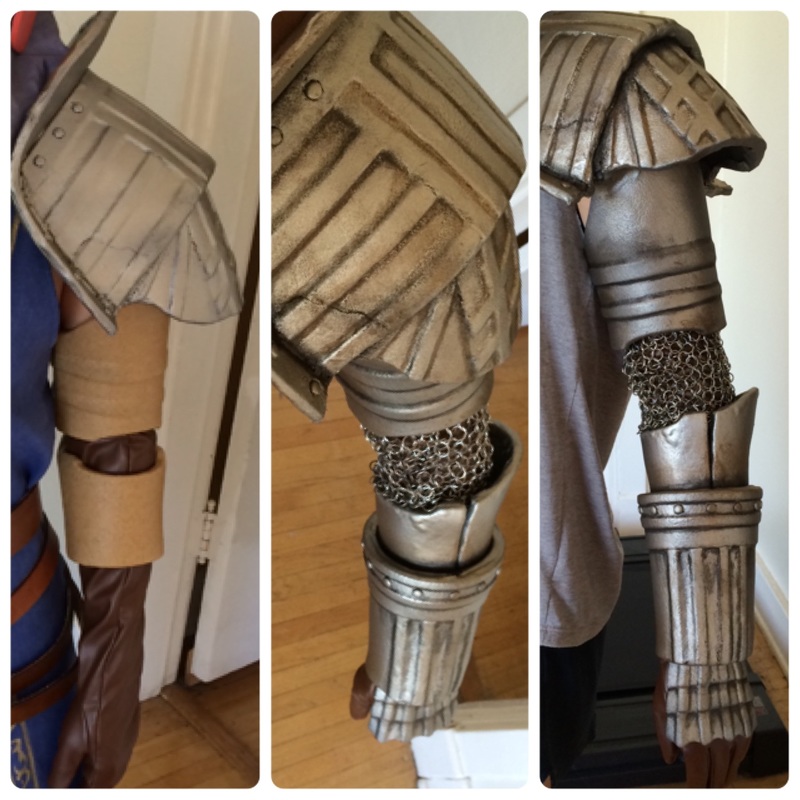
The next project I decided to tackle was Prince of Persia (2008). I played this game a few years ago but I decided to replay it recently. I want to eventually cosplay Elika too, but for now I'm going to be the Prince (well, I'm doing a genderbend.. so princess?). I'll be wearing this to AX 2015 on Friday and Saturday! 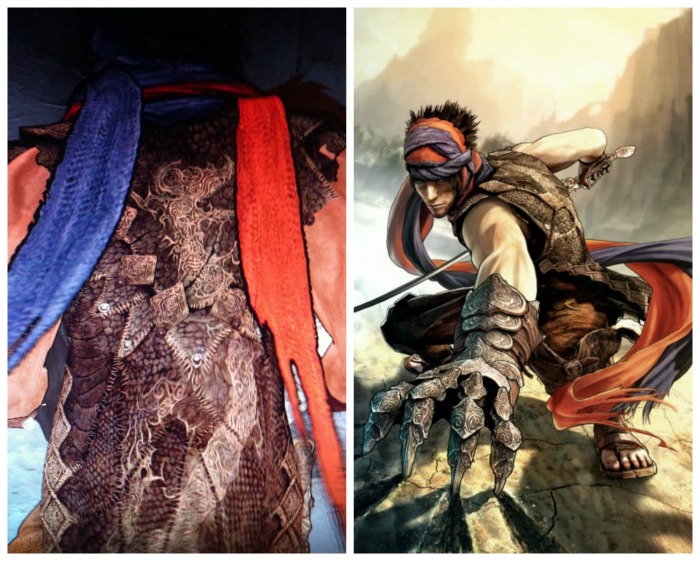 Progress The coat was made of two different fabrics in order to give it more texture, and the dragon on the back was made from gold puff paint. The belt and leg wraps were made of leather. The pants and scarf were made of linen and then dyed. The scarf was also sewed onto an elastic headband in order to assure that it would keep its shape. For the gauntlet, rather than using worbla and foam, I decided to make it out of leather. For color, the leather was dyed black and then dry brushed with silver acrylic paint. The shoes were originally from forever 21 and were dyed brown and modified with leather cut-outs. Lastly, the sword was made by harvestbuddy using komatex and worbla. I will post some pictures of myself in costume after AX is over.
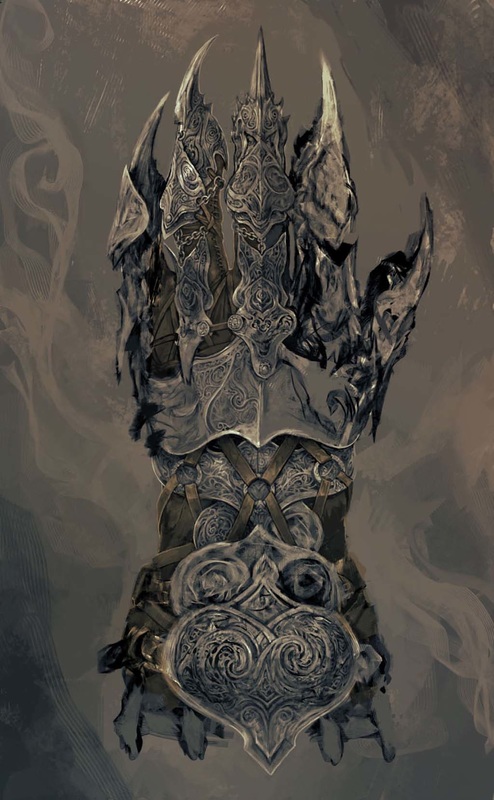
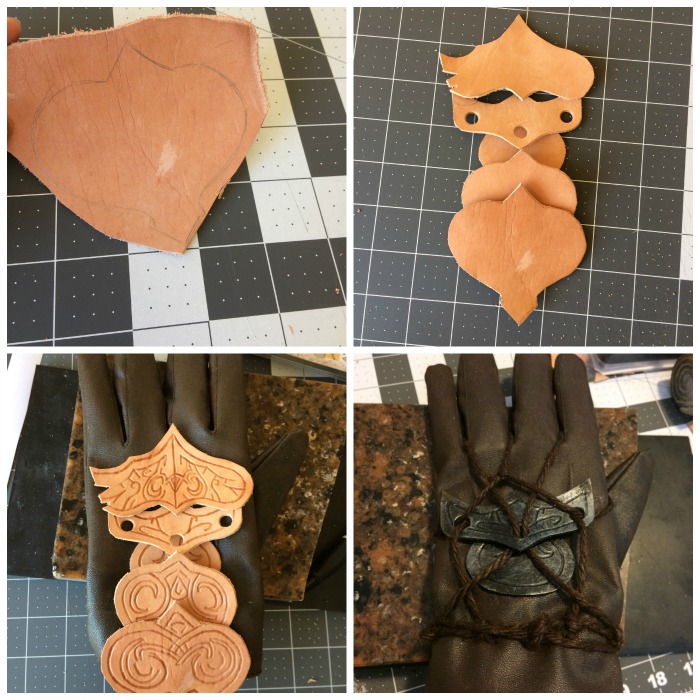
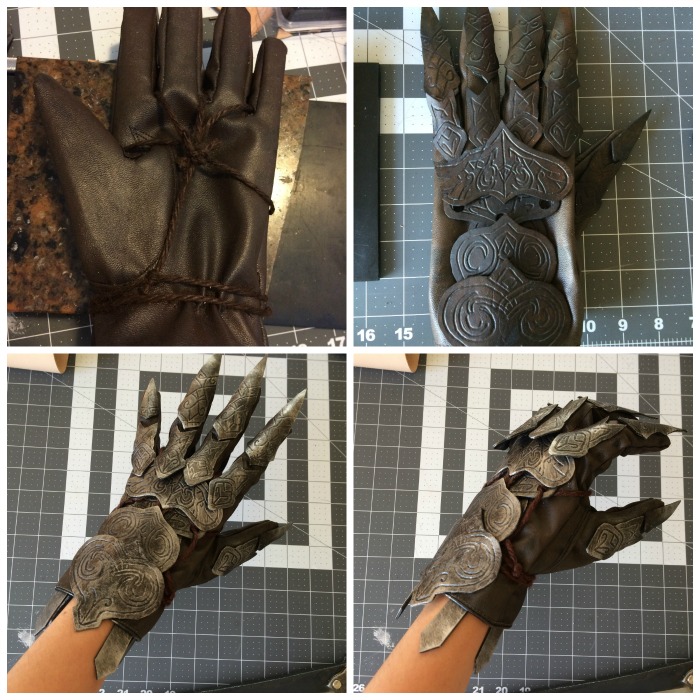
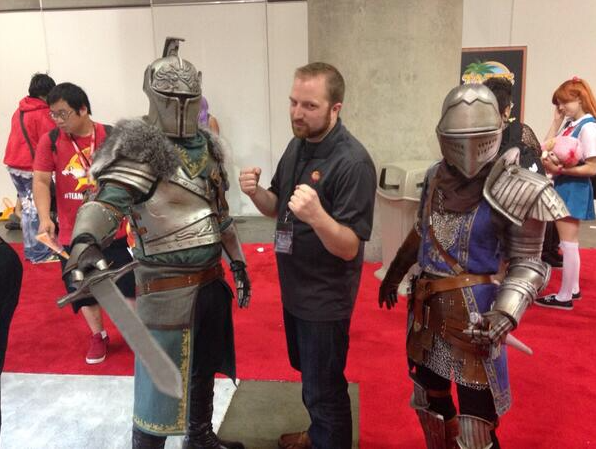
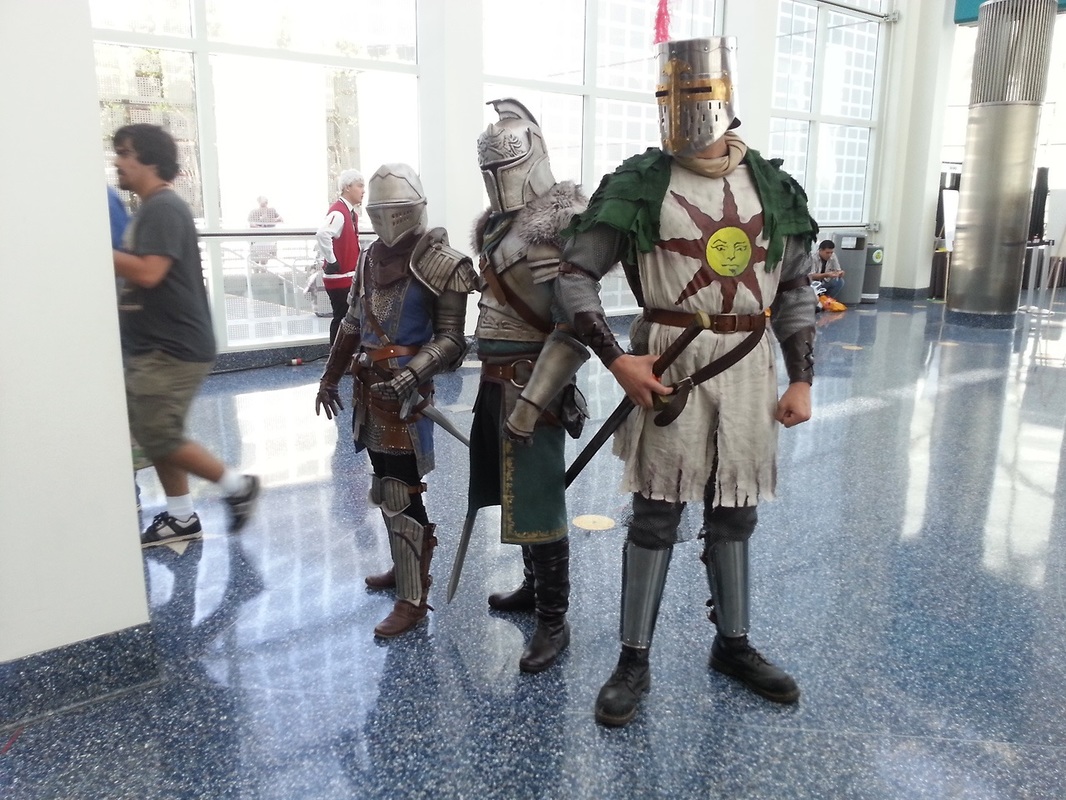
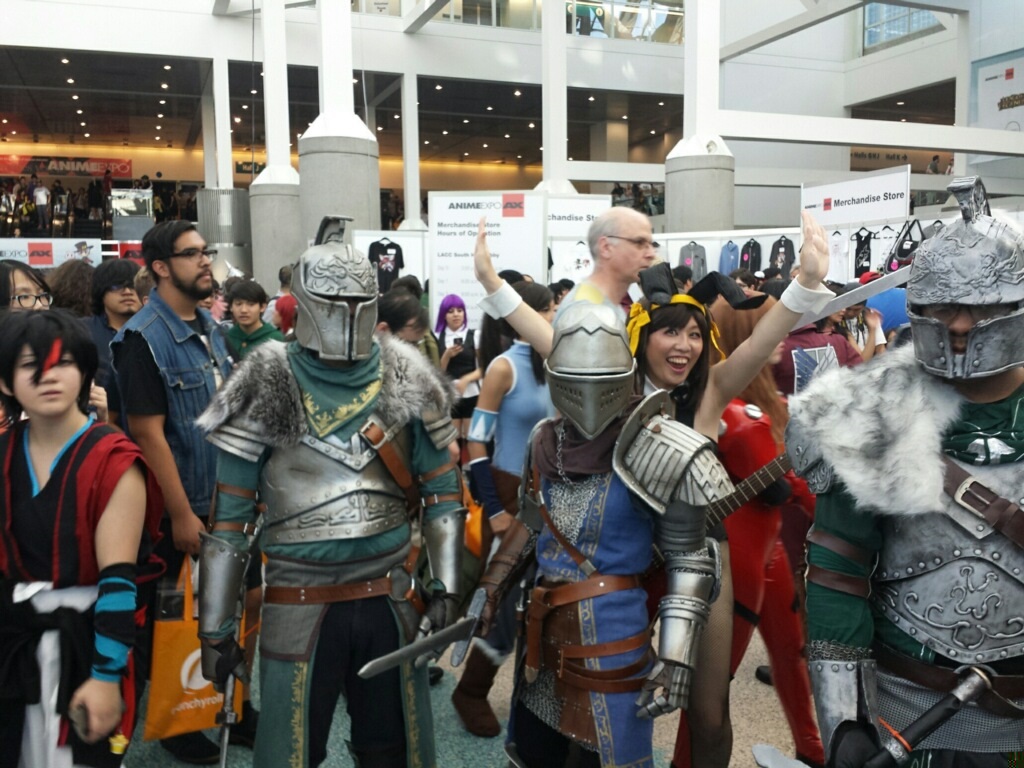
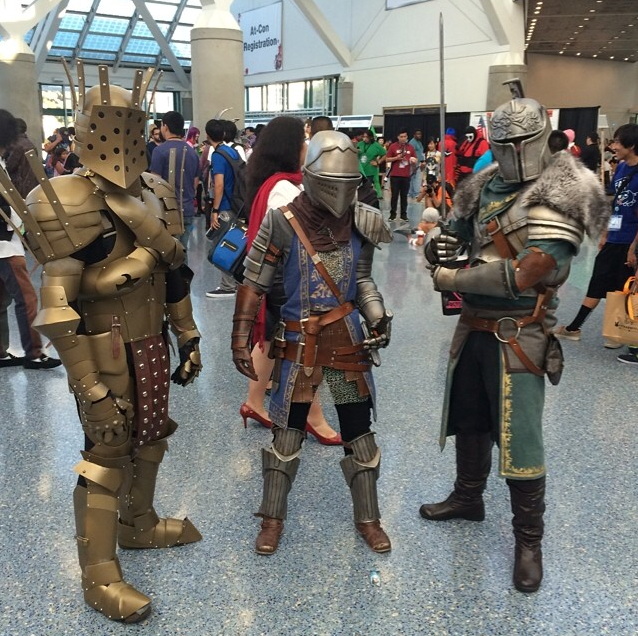
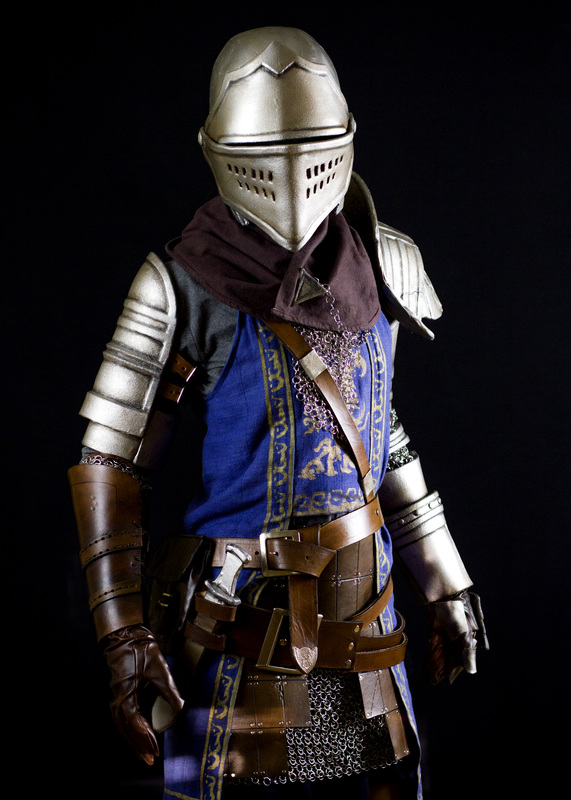
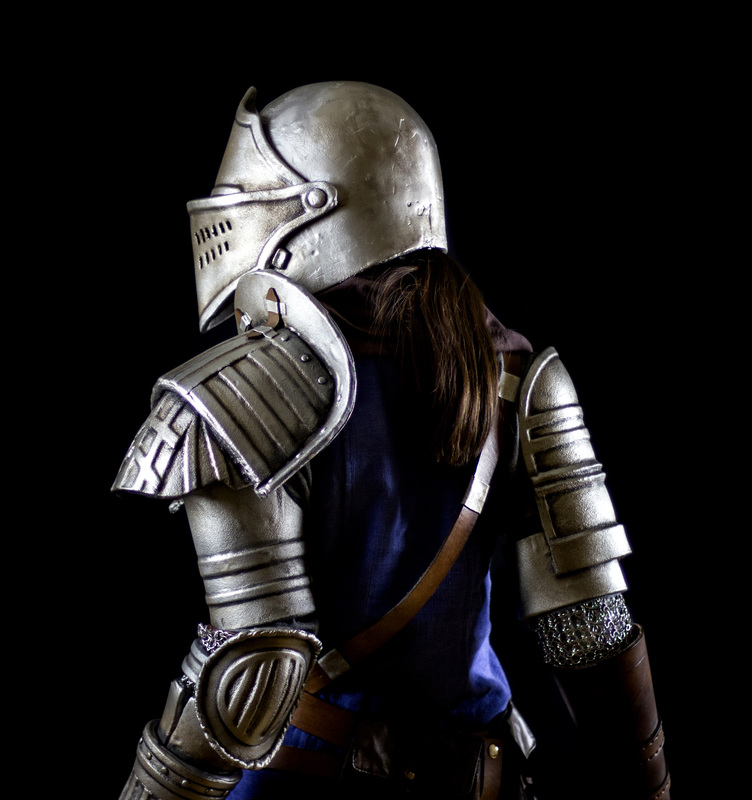
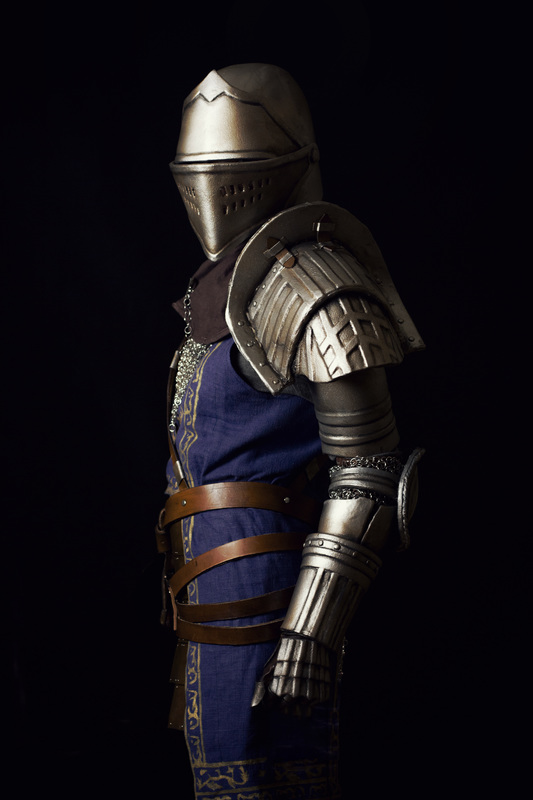
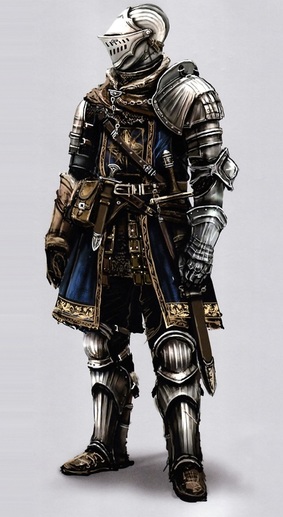 Here I'm going to include some information and progress pictures on my Elite Knight cosplay that I made in 2014. I grew fond of the Elite Knight armor since I wore it during the majority of both Dark Souls 1 & 2 ; v ; . So it's no surprise as to why I chose to make the costume. Progress (updated 8/15) I've been getting a lot of questions on how I made this cosplay. HB and I basically used the worbla armor method for Elite Knight and Faraam Knight (youtube has a lot of tutorials) but here are the specific steps we took if you're interested: 1. Draw out rough sketches of how the armor would look like and how it would form around your body. Once you are happy with your small sketch, grab a large piece of poster paper and redraw the sketch/pattern into life-size scale. Play around with the paper to see where it needs to be trimmed ect. Here is a picture of HB trying on his paper form. 2. Once you are happy with the paper pattern, flatten it out again and tape the edges onto a roll of foam. We bought our foam at foammart (the website has a variety of sizes and thickness. I used L200 foam for my thicker armor like the pauldron). Anyways, tape it to the foam and glide a hot knife around the edges of the pattern to cut the foam out. If the foam is thin enough, you can use a pair of ordinary scissors. Continue doing this with all your pattern pieces. Note*: For smaller designs/protrusions we used thinner foam (children's craft foam). 3. Once you have some of your foam pieces cut out, you can glue some of them together. We used super glue ("loctite" if you want specifics). Your glued pieces will end up looking something like this (the bottom right corner of the photo. the black material): 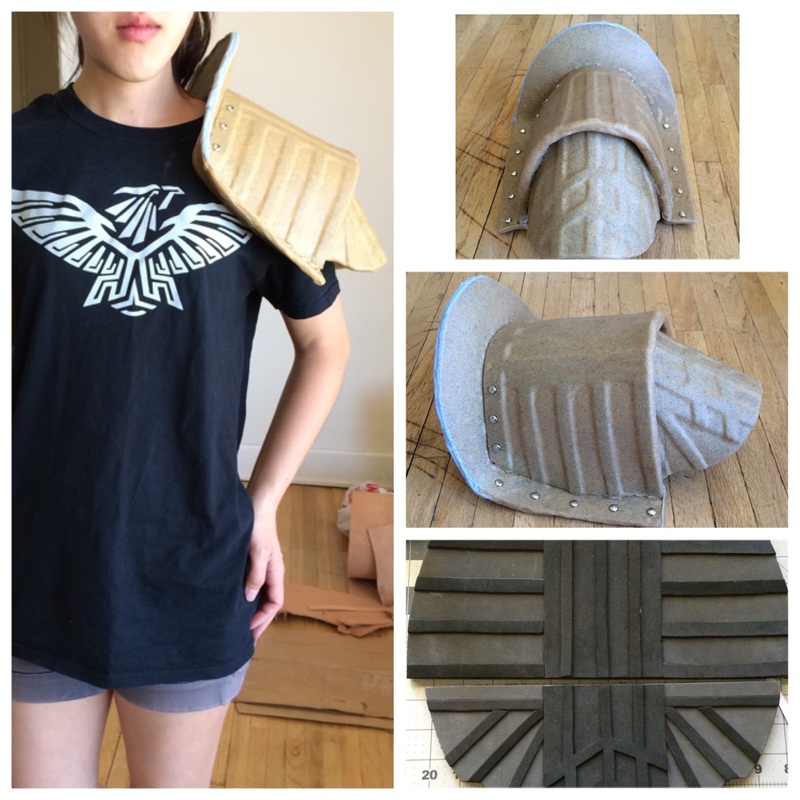 Another example would be of the Artorias HB worked on. 4.Now put the foam aside. Grab the paper pattern you made earlier, and tape the edges onto a roll of worbla. Cut it out with a hot knife. BUT instead of cutting right at the edge of the pattern like you did in the foam, you're going to want to leave about an inch margin (so the worbla piece will be slightly bigger that the pattern piece). 5. After you have your worbla piece cut out, you're going to heat it with a heat gun. Worbla is hard at room temperature, but when you heat it up it becomes moldable. Once the worbla is warmed up, press it on top of your foam pieces. The worbla's edges should be a little longer than the foam piece, you're going to want to fold these edges in. So the backside of the foam will be mostly bare, but the frontside would be completely covered in worbla. (Worbla is the tan colored material in the pauldron photo) 6. After the worbla cools, your armor will stiffen. Now for the color! Use plastidip spray over the worbla (it'll work as a base for painting). Paint with acrylic paints of desired color. Annnd you're done!! (These are just the steps that we took, but since there are multiple ways of making worbla armor, make sure to read up on other methods and find what works best with you) For leather accessories, they were made were made from varying weights of leather (6-10oz). Unfortunately, I can't give too much advice with leather working since I'm an amateur. If you're interested in working with leather, you may want to research more experienced crafters. The starting tools are also quite expensive so you may want to purchase them when they're on sale. If you would like a cheaper alternative, this video is very helpful with showing how to create fake leather out of foam: https://www.youtube.com/watch?v=PExIqTH5KFc For chainmail, I used the 4-in-1 method with aluminum jump rings, but it was really time consuming. If you want to save on time, an alternative would be to use silver spray over mesh fabric or a wool sweater (like this). Lastly, the tunic was made of white linen that was dyed. Gold designs were added using fabric and acrylic paint. Sorry there are no step-by-step photos, but I hope this helps! Here are some of my progress pictures: Anime Expo 2014 I met lots of really cool and nice people! Even though I didn't talk so much since I'm kind of shy haha. OH and if you happened to say hi and I didn't respond it's probably because my vision and hearing was really limited ; A ;. The whole time I could only see people's feet and stomachs, so I couldn't really tell if someone was speaking to me. Photoshoot Photos taken and edited by HB. Location photos were at Hawk Canyon, California.   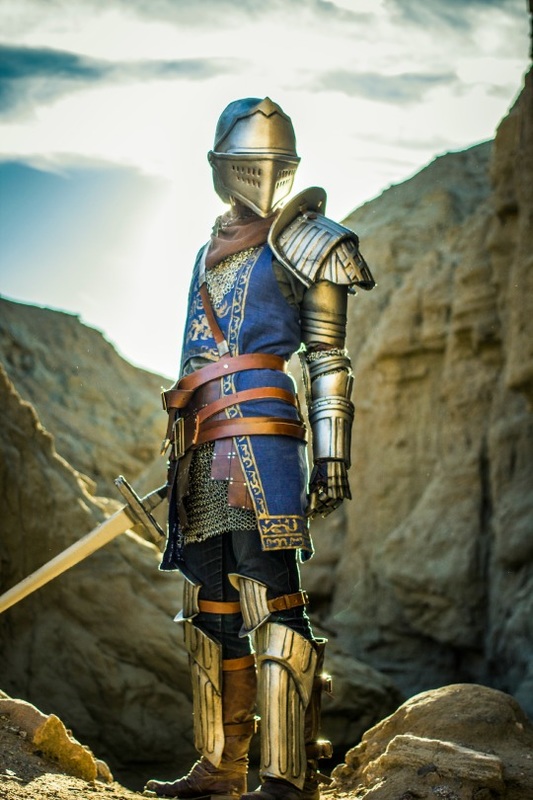 I had never dreamed that I would be making armor like this, so I'm really happy with the result. This cosplay was difficult but very rewarding, and I hope to do more Souls cosplays in the future.
Ok so in addition to my deviantart, I think I'm going to start posting up photos ect here.
So hi everyone, welcome to this thing. -RQ |
AboutHi I'm RQ and this is where I blog about my cosplay and daily life.
*I'm taking a break from cosplay.
Looking back at what I wrote in my posts make me cringe, but I'll leave this blog up in case people still want to use my cosplay progress/WIPs as a resource for their own projects. Categories
All
Archives
July 2017
|

 RSS Feed
